In this post I will show you how you can save lost VMs. Especially those that claim they cannot find thier hard drive after a firmwareupgrade.
However if you take a look at what file on the storage that hard drive points to the file is still there. If you now disconnect the harddrive and add a “existing hard drive” you cannot select it.
What files are relevant
To address the issue we will first have to look at what files we will have to touch
- .vmdk - Pointer to the virtual hard drive
- -flat.vmdk - the actual hard drive file
- .vmx - The file describing the VM

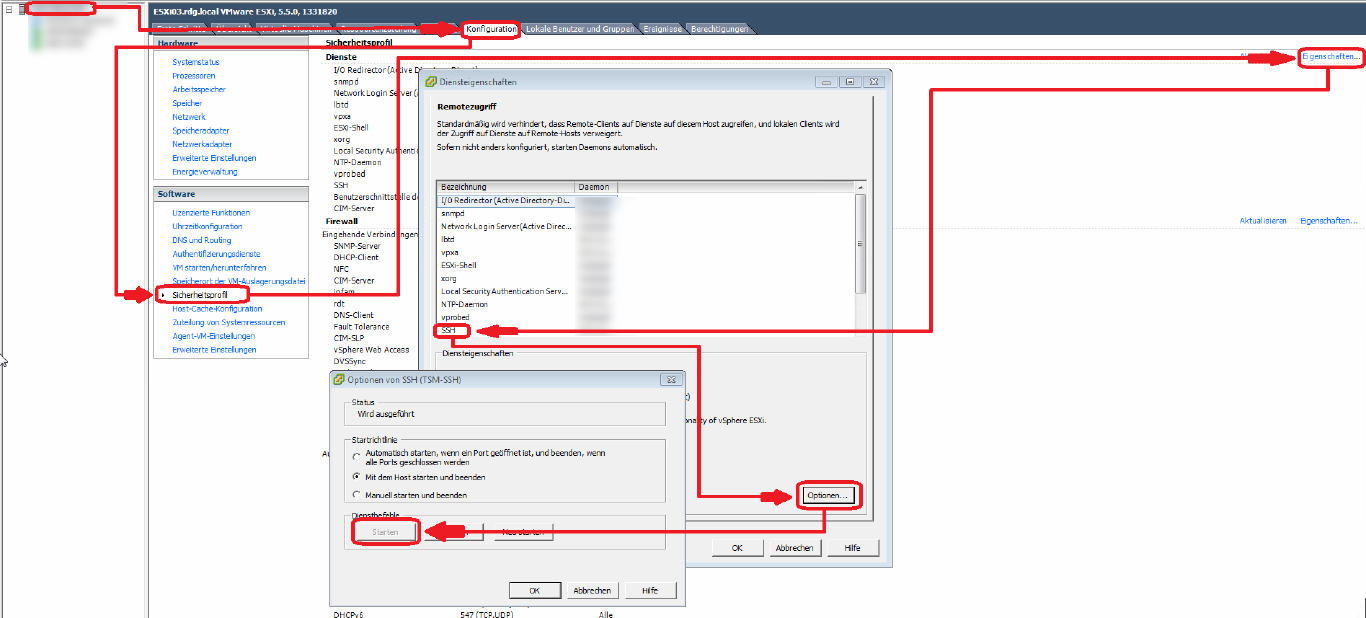
Enable SSH
You will need to enable SSH on the hypervisor to apply the fix Since it is just that intuitive, here a little graphic.
Setup a new VM
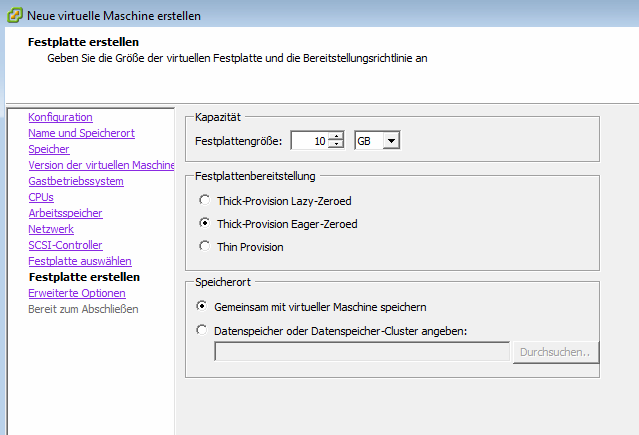
Create a new VM and name it what ever you want (different then the original) and give it a 10GB Harddrive with the same hardware configuration as the defect VM. You do not want the a server that expects two network cards to boot up finding only one or be unable to start a database as it suddenly has way less RAM available.
Check how much storage is left and that a copy of the VM fits cosily into the remaining space. (A good value to go by as proven to be 10% of the Storage should remain unused. If your storage is 10TB or more, 5% free should do.)
In this case the size of the VM is 250GB and I have about 2TB left.

Copy the hard drive
Connect to the ESXi host using SSH and navigate to the directory of your new VM. As the storage in this example is named “Storage” the command looks like this:
cd /vmfs/volumes/Storage

Do not wonder if you prompt is showing a different path. Storage is just a softlink pointing to the real path of the storage in the /volumes directory.
Now go ahead and delete the current -flat.vmdk of the newly created VM.
rm ./<Name der Neuen VM>-flat.vmdk
Then you copy the -flat.vmdk of the old VM into the directory of the current new one and give it the name of the -flat.vmdk you just deleted.
cp ../<NAME OF THE OLD VM>/<NAME OF THE OLD VM>-flat.vmdk ./<NAME OF THE NEW VM>-flat.vmdk
If the name of the old VM were “broken” and the name of the new VM “working” the command would look like this.
cp ../broken/broken-flat.vmdk ./working-flat.vmdk
The prompt will freeze until the copy process is complete. This can take a while, depending on the read/write speed of the storage.
In my case it took over 1 hour to copy 250GB… DO NOT turn on the VM once the copy process has finished.
Enlarge the Harddrive
The .vmx currently describes the connected harddive as 10GB in size. Go to the settings of the new VM and enlarge the harddrive to the original size +10GB.
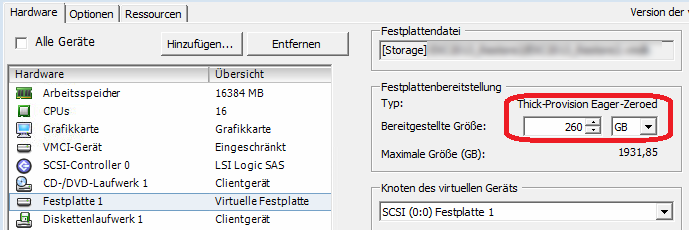
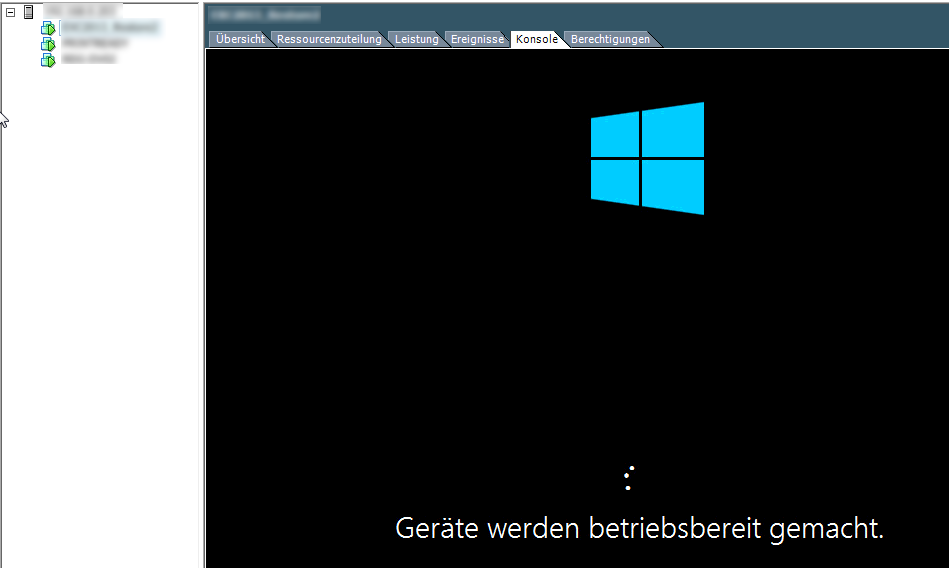
You should now be able to start the VM. If you are starting a windows server it can take quite some time on the first bootup after the restore.
The server will start with DHCP as it detected a new unconfigured network card. You cannot give the server the same IP it has before as there are still offline-adapters on the server blocking that IP.
To avoid unnecessary pain I suggest removing ALL network adapters from the VM and then go the to device management.
devmgmt.msc
Here you have to enable “show hidden objects”.
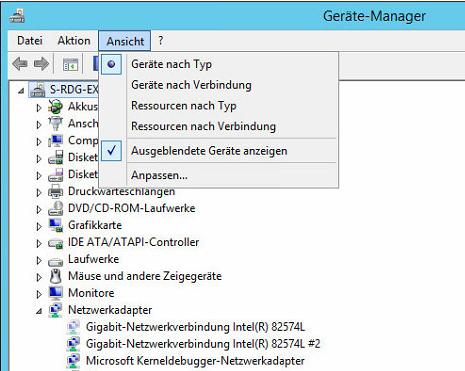
Go ahead and deinstall all VMware networkadapters.
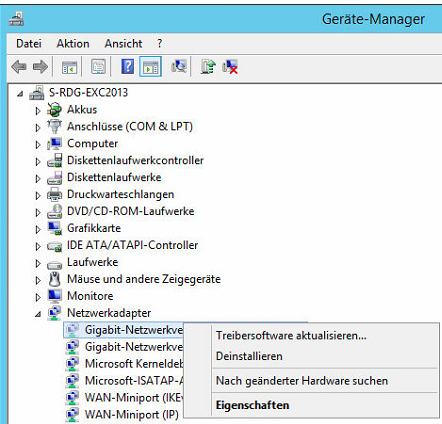
Next you will have to clean up the registry… Start the registry editor. (Windows + R -> regedit)
Delete the RegistryKeys at HKEY_LOCAL_MACHINE\SOFTWARE\Microsoft\WindowsNT\CurrentVersion\NetworkCards\
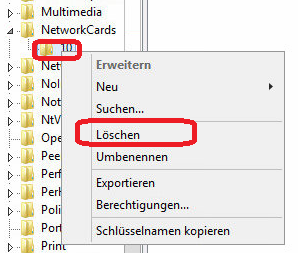
Shut down the server, add the needed network adapters and then finally start it to use it.
Cheers, Ori