In this article I want to show you how you can connect a linux host to check_mk. Lets add the linux server hosting the check_mk.
At first you will always have to install a so called monitoring agent. On the left hand side navigation bar scroll down to WATO - CONFIGURATION. and select Monitoring Agents.
In this case the server is ubuntu so we choose the check-mk-agent_VERSION_all with the ending .deb for debain based linux distributions.

Fastes way to get this package onto the target system is to simply copy the link and download the package using wget.
wget http://IP/Site/check_mk/agents/check-mk-agent_1.5.0p2-1_all.deb

Now install die package using dpkg.
dpkg -i check-mk-agent_1.5.0p2-1_all.deb

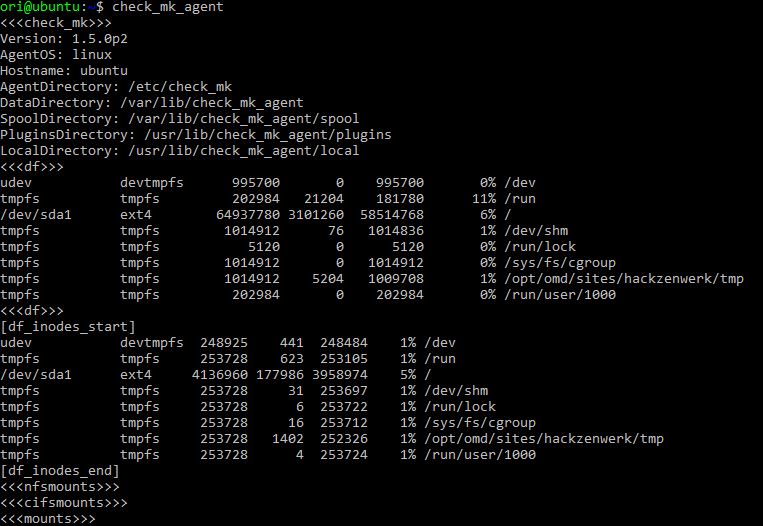
After installing the package the command check_mk_agent should be available generating a bunch of output.
Back to the check_mk web interface go to WATO - CONFIGURATION and select Hosts to add a new Host.

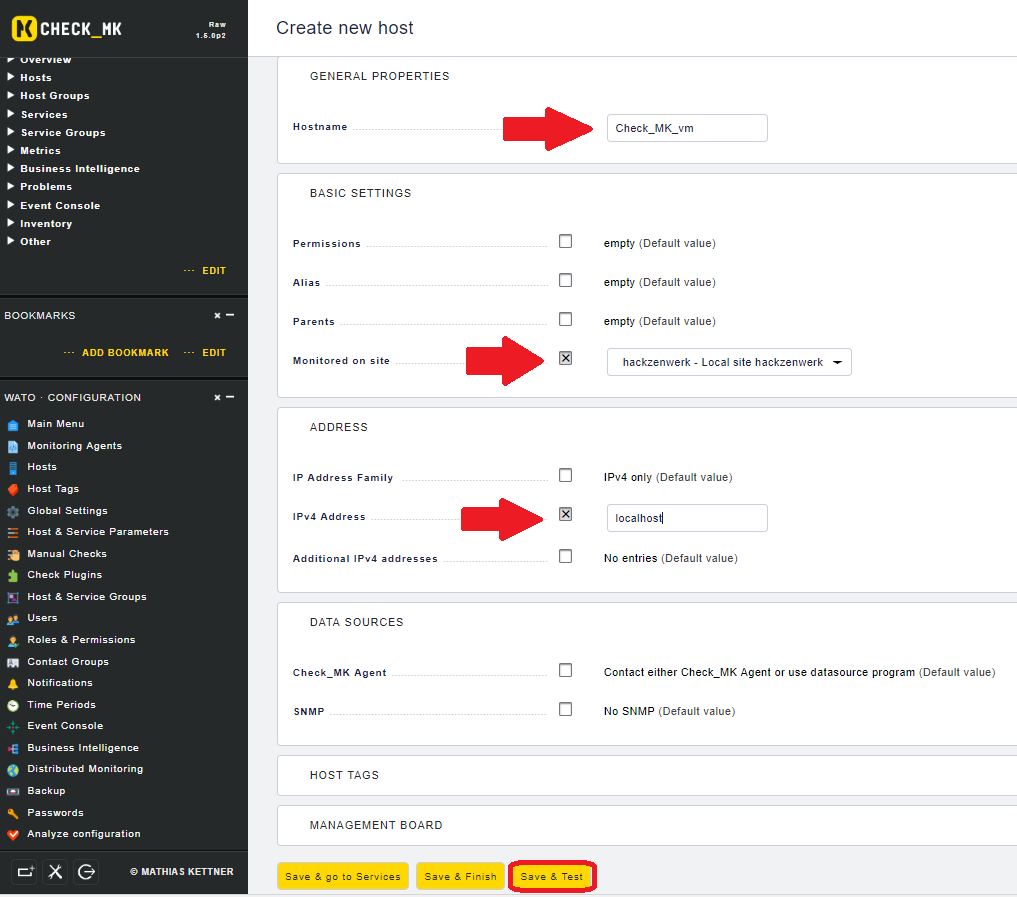
Here we give the new host a Namen, add it to a Monitoring Site and type localhost as the IPv4 address. Then klick on Save & Test.
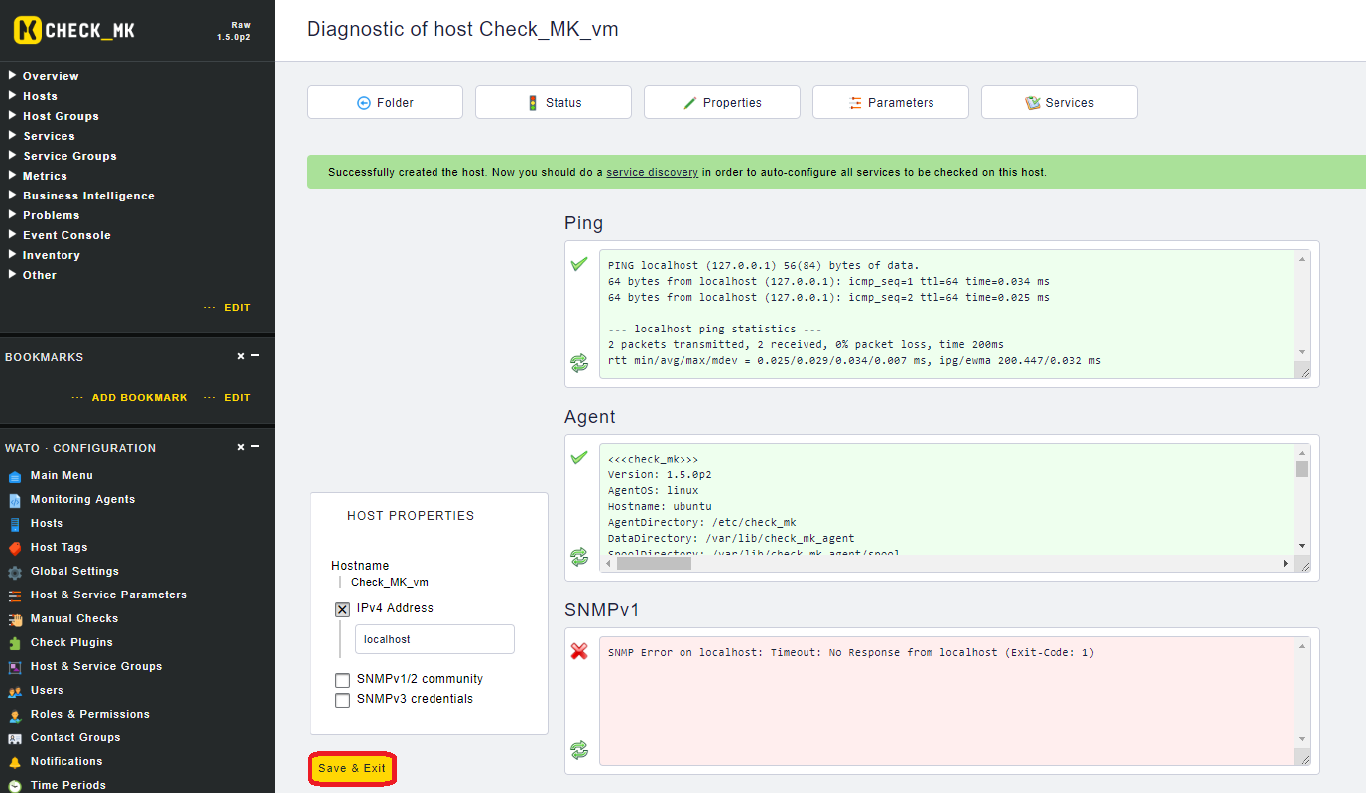
In the next window check_mk is testing the connection to the host using Ping, SNMP and Traceroute. When the tests are complete confirm by clicking on Save & Exit.
Now change to the tab Services. 
Here you can check what services have been discovered on the client and can be monitored. Confirm the preselection by clicking on Monitor.
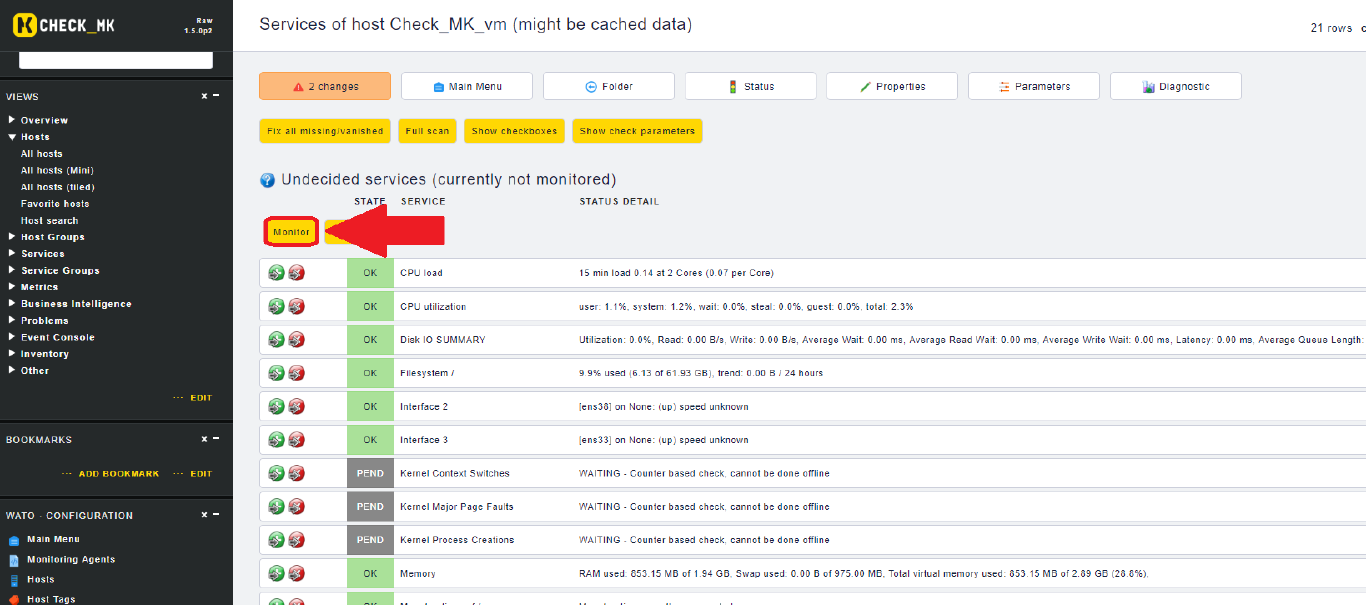
The view will change and you will notice a message informing you about uncommitted changes. Click on that message.
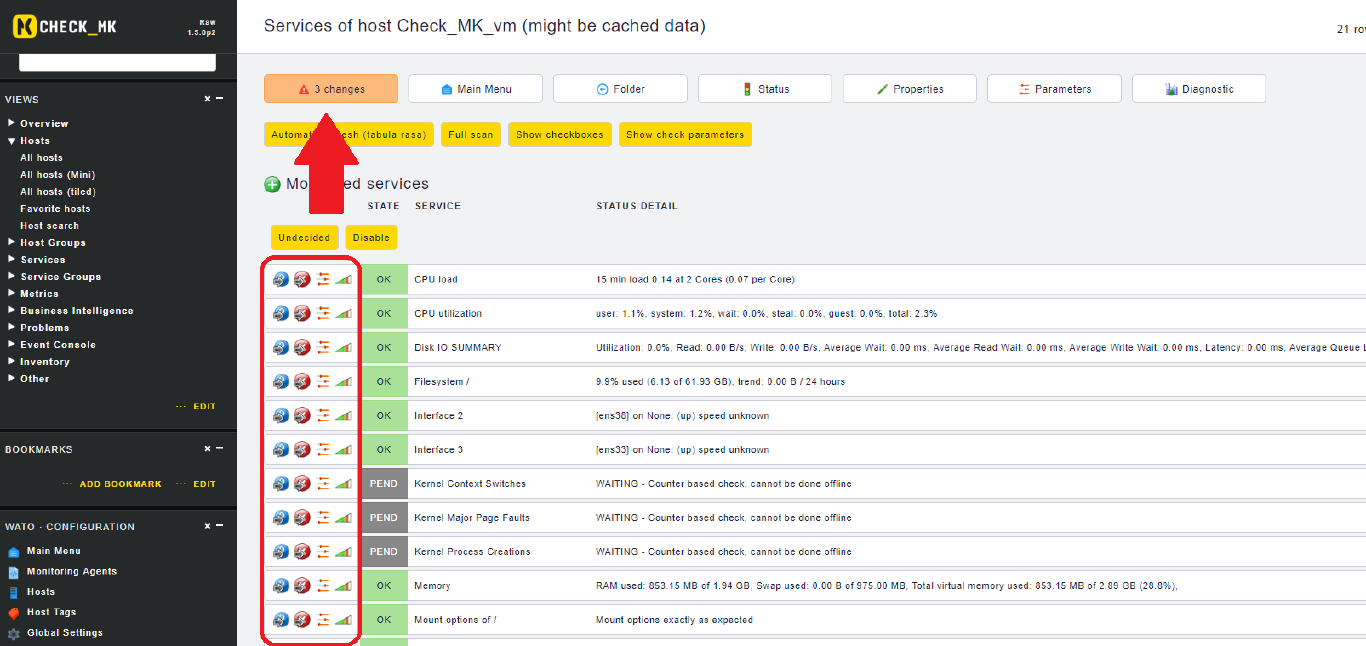
Select the site that you made changes to and click on Activate Selected. Now the client will be added to the active monitoring.

If you now change to the Views section and click on All Hosts you will find the newly added host.

Clicking on the hosts name you can see details on the monitored services.
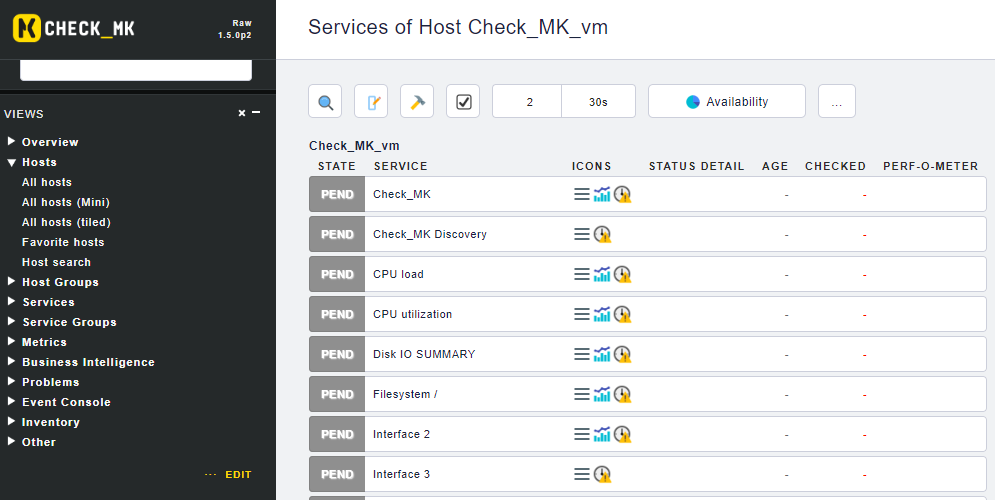
The State PEND (pending) and the matching clock symbol with the warning sign are an indicator that the service has just recently been added to monitoring. After a while these checks will come online and you will seed data.

Cheers, Ori